When I first started to "really" get in to eating healthy whole foods, I loved telling people "those are made with organic, whole wheat, pastured, grassfed" whatever. Upon hearing this one time, my friend Anne said "did you grind the wheat yourself too"? To which we both laughed and said something along the lines of "OMG, could you imagine"?
Ahem
Upon realizing how expensive flour was versus the cost of a grain mill, I decided to start saving for one. I saved, and saved, and saved, and was still probably about four months away from even thinking of being able to purchase one. Then, a random enormous Amazon box showed up one day, and you can imagine my surprise to open it, find the grain mill of my dreams with a note that said "happy birthday AND Merry Christmas, love Anne".
Before you ask, Anne is not accepting applications for new friends. Though she may be looking to replace me after I commented that her celeb crush, Adam Levine, looks like a "walking STD".
I've had the mill now for about 8 months and I couldn't be happier. I never really mentioned the details of it on here, until I received a sweet note from a blog reader last week asking me for information on how to grind her own wheat. So now, thanks to that reader, you're all about to get perhaps too much information on how a grain mill might be able to fit in to your kitchen.
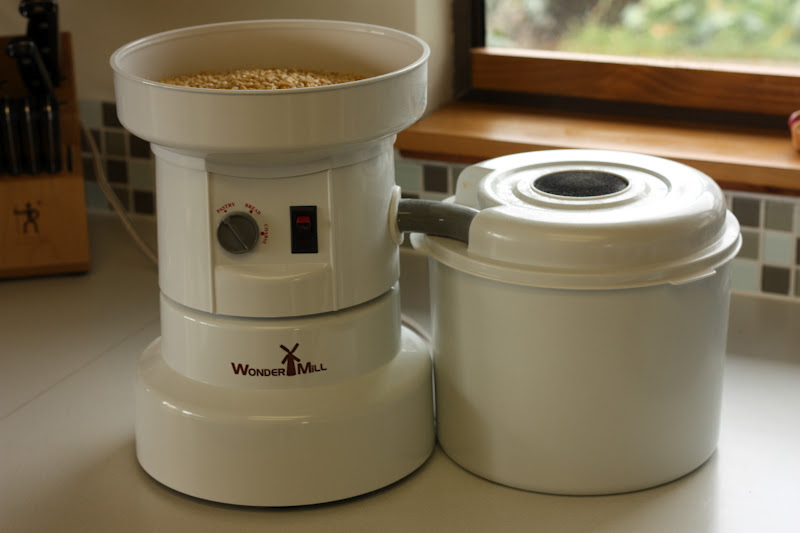
I am a proud owner of a Wondermill, but there are many options available. I know Kitchen Aid makes one that attaches to your mixer, but I feared that it would wear out my motor. Whatever your machine, they all essentially does the same thing - turn wheat berries in to flour. It can work with other grains too of course (corn, etc.), but mine has only been used as a basic flour mill.
Wheat berries that I purchase from Azure Standard are soft white, and hard white (which Troy tries to convince me was his nickname in high school. Not buying it.). Soft white is best used for baked goods like cakes, biscuits, cookies, pancakes, etc. I also use it for pizza dough. Hard white is only used in our house for homemade bread.
I get 50 lbs of organic wheat soft white wheat berries from Azure for $19.15. I used to get organic hard white for about $25, but I see it just jumped to $32.40 on Azure; yikes! Good thing I have approximately 4 billions pounds of it in my zombie pantry. The reader who contacted me about more details on wheat grinding also asked how long the wheat berries would store. To be honest, I don't know. I've had mine since the fall and keep them in pails with Gamma seal lids (also from Azure) which keep the berries in an air and water-tight environment.
The general rule of thumb is that one cup of wheat berries is equal to 1.5 cups of flour when ground. I'm not doing the math to figure out how much flour I get from my 50 lbs, but I know that I used to spend A LOT of money on flour every two to three months, and that is a thing of the past. These mills are pricey, but if you bake like I bake, the "break-even" point is fairly soon. It's actually immediate if your friend buys it for you as well. Ha!
In addition to the mill being cost-effective (eventually), there is also the flavor and nutritional factors to consider. Freshly ground flour is far superior in taste to store-bought. It has an almost "nutty" taste to it, and anything made with home-milled flour keeps you fuller longer than items made from store-bought.
The oils in wheat start to turn rancid quickly after grinding. So, the flour that is purchased from the store has to be treated or processed to make it shelf-stable. For the purpose of disclosure, I still buy King Arthur bread flour from time to time, as I put 1/2 cup in each loaf of homemade that I make. I store big containers of the freshly ground flour in the freezer; it stays soft and fluffy and keeps the oils from getting icky. And I'm not constantly having to grind flour which is a plus.
I've found that whenever I'm baking with whole wheat, it's best to add 1 tblsp of vital wheat gluten (I get it from Azure Standard) per 1 cup of flour. Without that vital wheat gluten, baked goods tend to go flat or taste like a brick. Mmmm...bricks.
So, here is the base of the grinder.
The lid of the grinder goes on the flour bucket. Flour bucket is not the technical term. This isn't food mill porn (well it kinda is). The gray hose goes in the hole. It's a tight fit. That's what she said.
Lest you forget, you need to turn on the mill before adding the grain.
I always grind everything on the "pastry" setting for a finer flour. Hit "on", and let it go for a few minutes, and voila, flour.
If you're thinking of adding a grain mill to your kitchen, I'd highly recommend it! I'm happy to answer any questions you might have about the ins and outs.
That's what she said.
I've shared this over at Real Food Wednesdays, Frugally Sustainable, It's a Keeper, and Simple Lives Thursdays.